Last Reviewed: 2/14/2019 by cah
Overview
Adding alternative text to images in HuskyCT provides learners with low vision and those using screen readers with important information about the meaning of the image. This article provides information about why alternative text descriptions are important, as well as step-by-step instructions for completing this relatively easy task.
Any image used in your course to convey meaning to learners should include a brief but meaningful description. Whenever an image is inserted into an item or assessment in HuskyCT, you will be prompted to provide a description of the image.
Why is Alternative Text Necessary?
- Alternative text makes information accessible to both the visually impaired, who use assistive devices such as screen readers, and those who might turn images off due to bandwidth issues.
- Students with visual impairments and cognitive disabilities will often use screen readers to navigate an online course. Screen readers are unable to read images and therefore are unable to convey information to students.
- Students might have a poor network connection, causing images to load slowly, or not at all.
- Some students learn better by reading descriptions of images.
- Images which are strictly used for visual appeal don’t need a description. Screen readers will skip images that don’t include alternative text. If this happens, students might miss out on important information.
How to Describe Images with Alternative Text:
- Ensure accuracy. Convey the full meaning of the image.
- Be succinct. The description should only be a few words, although it might be necessary to provide a few sentences in order to accurately convey the meaning of the image.
- Include text within an image. If an image has text in it, include each word.
- Avoid using “Image of…” or “Graphic of…”. Screen readers will announce an image to the student, making those terms redundant.
How to Add Alternative Text to Images in HuskyCT:
In the following example, we will insert an image of Thomas Jefferson.

Step 1:
Select the Image icon in the Content Editor toolbar.

Step 2:
Select your image by browsing either My Computer or the Content Collection. Once selected a preview of the image displays. Enter a description of image in the Image Description field. This becomes the Alt Text.
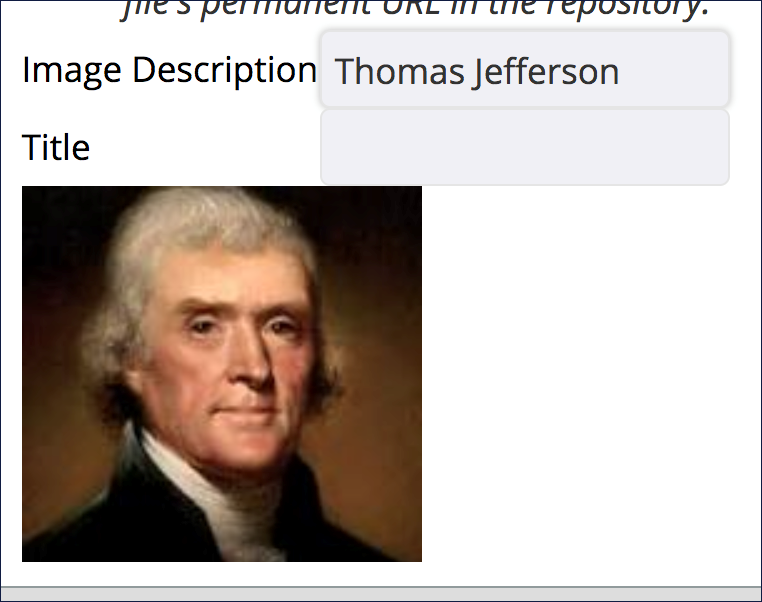
NOTE: By entering a title in the Title field, students can hover over the image and the title will display, however this feature is browser and operating system dependent.
When complete, click Insert.
Step 3:
Blackboard Ally provides a meter to show the accessibility of the image.
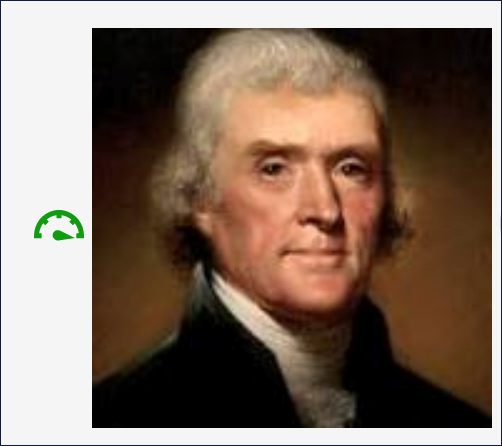
To make a revision to the description, select the meter image and follow the guidance Ally provides.
For more information on adding alternative text to images, see the following sites:
- Web Content Accessibility Guidelines: Provide equivalent alternatives to auditory and visual content
- Blackboard Help: Add Image Descriptions